As road incidents soar and vehicle technology evolves, dash cams will become indispensable for drivers and commercial businesses in 2024. Let’s explore the realm of most dash cams and in-vehicle camera installations, where we’ll cover the basics, techniques, and best spots for placement while answering common questions.
Our detailed guide will lead you through each installation step, offering valuable insights and straightforward strategies for success. From identifying the perfect dash camera position in your vehicle to seamlessly routing cables, we’re here to simplify the process. By the time you finish reading, you’ll be equipped with the knowledge and skills to become a dash camera installation expert!
What Are The Benefits Of Having A Dash Camera Installed?
Installing a dash cam in your vehicle offers various advantages, spanning security and convenience. From aiding in resolving disputes with other motorists to providing crucial footage for insurance claims, the popularity of dash cams and its use in commercial business fleets is on the rise. Here are several benefits of incorporating a dash cam into your fleet vehicle.
Peace of Mind
A dash cam in your fleet vehicle offers reassurance, security and improves safety, as it provides video evidence to help tackle false claims against your company, exonerate your company and drivers if an incident occurs. This mitigates disputes with other drivers on the road and provides valuable insights into accident details, while helping to improve safety practices by coaching your drivers when they are distracted while driving and reminding them to keep their eyes on the road at all times.
Insurance Claims
Dash cams provide time, date and location stamped videos of incidents, providing accurate evidence of any incident, which speeds up insurance claims processing. This facilitates a more seamless resolution process for insurers and claimants.
Cost Savings
Insurance companies are incentivizing companies that use dash cams in their business by offering policy discounts. These devices lead to reduced insurance premiums and lower long-term repair and service costs. This trend reflects insurers’ recognition of dash cams’ crucial role in improving road safety and facilitating more accurate claims processing.
Convenience
Dash cams are wirelessly connected and provide remote access to on-board video when needed. Additionally, dash cams will track the vehicle and report its position on an online map screen every 15 seconds. This helps companies quickly know where their fleet vehicles are at all times, review routes and stops taken, and provides access to all recorded video and footage being captured by the dash cams within a few seconds, when needed.
Read the next blog: Is a Dash Cam Worth it?
Two Methods for Dash Cam Installation
1. Using the Cigarette Lighter
Individual consumers favor this approach, as many retail outlets offer dash cams of this kind. It simply connects the dash cam’s power cord to the vehicle’s cigarette lighter USB port or socket. Typically, this setup powers the camera only when the engine is running, which can be either advantageous or disadvantageous based on your dash cam requirements and vehicle type.
Newer vehicles usually have lighter sockets that deactivate when the engine is off, while older models tend to have sockets that remain active regardless of engine status. For vehicles with always-on sockets, dash cams powered through the cigarette lighter can continue recording footage, potentially draining the vehicle’s battery.
This constant power supply maximizes parking mode functionality, allowing continuous recording even when the engine is off, which is particularly beneficial for overnight vehicle surveillance.
Benefits of using a CLA
Installing dash cams via cigarette lighter socket plugs is swift, straightforward, and uncomplicated. It optimizes access to the vehicle’s power source with minimal effort. No professional assistance or workshop visit is required when using this approach. Should you need to relocate your CLA-powered dash cams to another vehicle’s electrical system, the process can be swiftly and effortlessly accomplished. There’s no need for complex hardwiring adjustments.
Challenges of using a CLA
Employing parking mode while utilizing dash cams linked to constantly powered cigarette lighter plug sockets can swiftly drain your car’s battery. This diminishes the parking mode feature’s efficiency on your dash cam.
Dash cams installed via CLA methods lack tamper-proof protection or other security measures, making them vulnerable to theft or tampering. The ease with which the cable can be plugged in and unplugged raises the possibility of unwanted access.
The connection may become unstable if the dash cam’s power cord slides too loosely into the car’s power outlet. This can result in missed recordings of critical incidents, undermining the dash cam’s effectiveness in providing reliable evidence.
2. Hardwiring
Connecting your dash cam to the constant 12v power source or fuse in the fuse box allows continuous recording even when the vehicle is off, maximizing parking mode capabilities to capture incidents like theft or vandalism. This approach typically involves connecting two wires from the hardwire kit provided with dash cams designed for hardwiring.
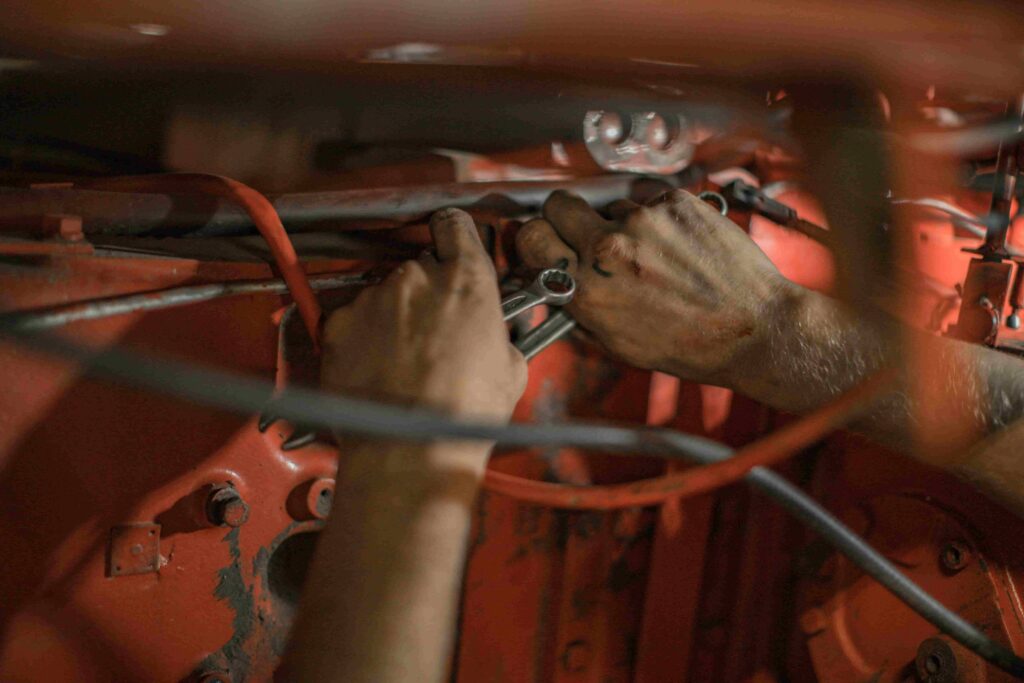
One wire connects to a constant 12v power source for uninterrupted power, while the other grounds to a metal bolt for safety. Dash cam hardwiring can be complex and risky for most individuals, often requiring professional installation for safety and optimal performance assurance. A quick-connect fuse kit or OBDII connection cable can be used to make the process easier.
Benefits of using the Hardwiring method
Hardwiring your dash cam to the vehicle’s 12v system helps keep a stable and secure connection and minimizes signal interruption risk. The direct and firmly attached connection makes it challenging for potential thieves to tamper with or remove the hardwired dash cam, providing added security.
With wires neatly organized and routed in the vehicle, the overall setup appears tidier compared to using the CLA system.
Challenges of using the Hardwiring method
Hardwiring your dash cam involves a more intricate process compared to the CLA method, potentially necessitating professional help and in most cases consuming more time. Incorrect wiring attempts by inexperienced individuals can lead to vehicle and equipment damage, along with warranty issues.
Opting for hardwired installation results in additional expenses, including the purchase of installation kits, adapters and potential fees for expert assistance.
Dash Cam Types and Configurations
There are various dash cam types and configurations, each offering unique features and installation methods for different vehicle models.
Front Road-Facing Camera Only
The front view road-facing dash cam records video of the road ahead and offers clear visibility when securely mounted just under the rearview mirror on the windshield, providing an unobstructed view of the road. Most companies that don’t want to view in the cab or the drivers choose this camera setup as it covers the majority of incidents and accidents on the road that happen in front or on the sides of the vehicles.
Rear Cam
Mounted on the back of the vehicle, the rear dash cam captures footage of events occurring behind the vehicle, providing additional coverage and ensuring a comprehensive recording of both the front and rear of the vehicle at all times.
Dual Dash Cam
An all-in-one road and driver facing dash camera, mounted just under the rearview mirror, records the road ahead and what’s happening inside the cab. The ability of this dual-facing camera to record video both on the road and in the cab simultaneously improves overall security and monitoring capabilities, while helping to identify and coach bad driving behaviors.
External Dash Cam
Mounting cameras around the vehicle, such as on the sides or back of the fleet trucks, provides coverage around the entire vehicle. Mounting the road and driver facing camera on the windshield and the exterior cameras, or over the existing rear view mirror, offers both convenience and functionality, ensuring seamless operation and enhanced safety.
Dash Cam Installation Process
Let’s start with learning and understanding the fundamentals of dash cam installation, and exploring essential steps and techniques for a seamless setup process.
1. Select the right dash cam
Select a dash cam based on your needs, considering features like storage capacity, GPS, parking mode, and factors like video quality. Before deciding, make sure it fits your needs and preferences.
2. Plan the installation
Decide on the best locations for front and rear or outside cameras, ensuring they have clear views of the road and surroundings. Plan cable routes carefully to maintain a tidy installation and discreet setup. It’s important to keep unobstructed views and neat cable management for optimal performance and aesthetics of a pillar and discreet setup.
3. Prepare the tools
Collect essential tools like a trim removal tool, wire strippers, cable clips, electrical tape, zip ties, and a multimeter to aid in the installation process. These tools will facilitate tasks such as removing panels, securing wires, and testing electrical connections for a smooth and efficient installation.
4. Power source selection
If you want continuous power, you can either hardwire to the vehicle’s 12v system or fuse box or use the cigarette lighter for easier installation. Depending on your needs and preferences, installing a cigarette lighter may be simpler but may not allow parking mode, whereas hardwiring guarantees a continuous power supply but involves more work.
5. Hardwiring installation
Identify an appropriate and reliable 12v power source for continuous and switched power. Utilize add-a-fuse adapters to connect the dash cam’s power cable to the selected fuse. Conceal the whole vehicle’s power supply power cable all along the vehicle’s interior, routing it beneath trim panels or headliners. Ground the dash cam’s power cable to a metal surface within the vehicle’s interior for proper installation.
6. Cigarette lighter installation
Carefully route the power line through the interior of the car after plugging the dash cam mount’s power adapter into the cigarette lighter port. To keep the installation neat and discreet, make sure the wire is positioned so that it doesn’t impede driving controls or obscure vision.
7. Mounting the dash cam
Securely affix the dash cam and rear camera (if applicable) to the windshield or other appropriate surfaces using adhesive mount mounts or provided mounting hardware. Position your dash cams to capture optimal recording angles while minimizing potential interference, providing clear, unobstructed views for effective surveillance.
8. Final testing
Turn on the dash cam and confirm that it accurately records footage when the vehicle ignition is activated. Adjust camera angles and settings to guarantee smooth operation before completing the dashboard and installation process.
9. Cable management
Use zip ties to secure any loose cables and hide them discreetly behind a pillar or along the vehicle’s interior to uphold a neat and organized look while also preventing any hindrance to driving controls or visibility. Don’t miss this if you want a tidy installation and minimize distractions while driving.
10. Adjust Settings
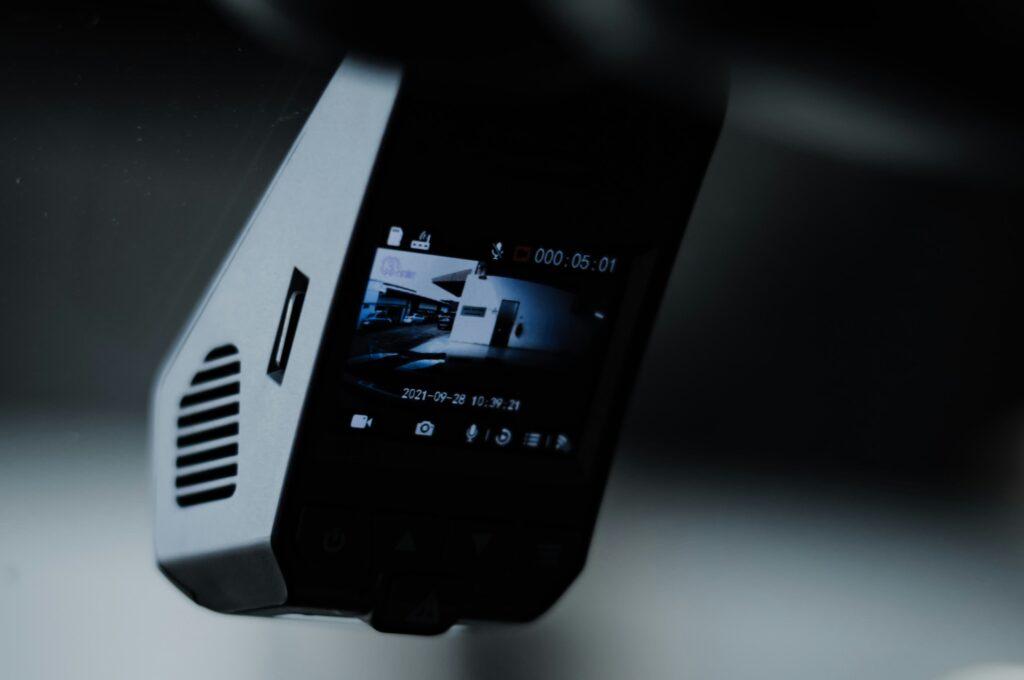
To adapt the dash cam panel’s settings menu to your tastes and local laws, you can change the loop recording duration, parking mode settings, and video resolution. To have the best performance and functionality, adjust these parameters to your location, unique needs, and expectations.
11. Verify functionality
Test the dash cam’s recording performance by taking the vehicle for a test drive and evaluating its effectiveness in capturing footage across different driving conditions, including daytime and nighttime scenarios. Adjust the settings to optimize performance and bring you reliable recording under varying circumstances for enhanced functionality.
12. Regular maintenance
Make sure the dash cam is free of dirt or debris that could affect the recording quality and that it operates as intended by giving it a routine inspection. Keep the camera lenses clean by wiping them as necessary to preserve optimal performance and ensure precise and reliable footage capture.
Should dash cams be installed by a professional?
Professional installation depends on factors necessary for your dash cams, such as your comfort level with DIY projects, the complexity of the system, and your vehicle’s specific requirements.
While a basic front-facing dash cam powered by a cigarette lighter can typically be self-installed, more intricate setups, like dual cameras or hardwiring, might benefit from a professional installer and expertise.
The Best Car Spots for Dash Cam Installation
These are the best spots to place your dash cam:
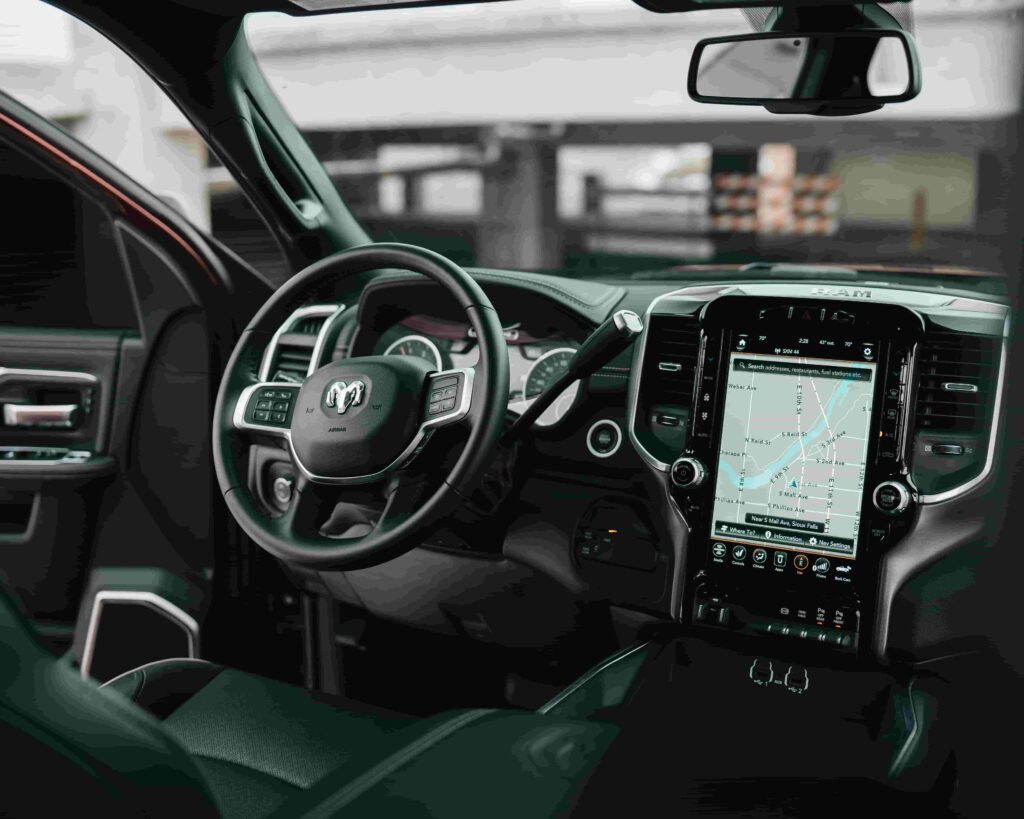
1) Below the rearview mirror on the windshield for front-facing or all-in-one road and driver facing cameras
Placing road-facing dash cameras behind the driver’s view of the rearview mirror on the windshield gives you an advantageous viewpoint, offering a clear perspective of the road ahead without hindering the driver’s visibility. We recommend this position because it minimizes distractions and has a broad field of view for effective recording.
2) On the rear windshield or window for rear-facing cameras
Mounting rear-facing cameras on the rear windshield or window allows for capturing events behind the vehicle, providing additional surveillance coverage. This setup enhances the rear camera and dash cam system’s overall monitoring capabilities.
3) Any location that provides an unobstructed view of the road
The layout and design of the vehicle influence where the dash cam should be installed. The most important thing is to choose and install in a location that minimizes driver distraction, provides excellent camera functioning, and brings you an unhindered road view.
Steps After Installation
Once the dash cam installation is done, adjust settings like resolution, date, recording intervals, and parking mode. With everything configured, your dash cam is ready for action! Regularly inspect your device, ensuring it’s securely installed and cables are intact. Check video recordings periodically to ensure proper functionality, enhancing road safety.
Regular Maintenance Requirements
Maintaining your dash cam is crucial for its optimal performance. Neglecting upkeep could lead to a decline in functionality over time. Here are some essential maintenance steps to have dash cams that continue to operate efficiently:
- Check the wiring and mounting hardware regularly every few months. Verify that every screw and attachment is firmly tightened, and look for any wear or damage on the wires. This guarantees the best possible operation of your dash cam system and helps preserve the integrity of the installation.
- Once a month, gently wipe the lens with lens wipes and a soft cloth to maintain clear images and high-quality videos. This routine cleaning helps prevent dust and smudges from affecting the camera’s performance, ensuring optimal recording quality.
- Make sure you have extra copies of your video files safely preserved by regularly backing up your files in case something unforeseen happens. By taking this preventative step, you can protect your film and feel secure, knowing that your recordings are kept safe and accessible when needed.
- Ensure that you periodically update the software of your dash cam with GPS functionality to maintain accurate tracking and location data. Keeping the software current is key for a dash cam that provides reliable information, enhancing its effectiveness in recording and documenting your journeys.
FAQs About Dash Cam Installation
Can I install a dash cam myself?
Absolutely, setting up a dash cam on your own is quite feasible in various scenarios. Many dash cams are packaged with straightforward installation guides, and even basic do-it-yourself abilities are usually enough to get the job done.
If you have the right equipment and carefully follow the directions, you should be able to attach the dash cam and connect it to your car’s power source without hiring a professional. Professional assistance could be recommended, though, for installations or hardwiring that are more complicated.
Do I need professional help to install a dash cam?
Needing professional help to install a dash cam depends on various factors. Simple installations, like utilizing the cigarette lighter for power, are usually manageable without professional intervention.
Yet, when it comes to intricate configurations such as hardwiring or incorporating multiple cameras, seeking professional assistance could be somewhat better. This way, you’re guaranteed proper installation. Additionally, you can minimize potential damage to the vehicle’s electrical system, which may be necessary for specific vehicle models or advanced features.
Where should I mount my dash cam?
Determining the perfect spot to mount your dash cam is influenced by factors like the angle of the camera model, your vehicle’s design, and your preferences. Standard options include positioning it behind the rearview mirror for front-facing cams, on the rear windshield for rear-facing ones, or over the existing rearview mirror for mirror dash cams.
The key is selecting a location that ensures a clear road view and reduces driver distractions.
How do I power my dash cam?
You can power your dash cam using the vehicle’s 12v system or fuse box for hardwiring or the cigarette lighter for a more straightforward setup. Hardwiring provides continuous power while plugging in the cigarette lighter, offering easy installation. Choose the method that suits your needs and vehicle requirements.
What tools do I need for dash cam installation?
A trim removal tool, wire strippers, electrical tape, zip ties, and a multimeter to check electrical connections are necessary for a good dash cam setup. Several instruments are essential to achieve a vital installation.
They allow you to carefully arrange cables and verify a solid connection for your car’s electrical system, which guarantees your dash cam will function at its best. They empower you to neatly arrange cables and establish a reliable connection to your vehicle’s power source, ensuring your dash cam functions smoothly and effectively. Make sure to have these tools ready before starting the installation.
Can I hardwire my dash cam?
You can snake the cables for the dash cam down the inside of the car and tuck them under headliners or trim panels for a neat and discrete installation. To keep the cables from hanging loose and blocking vision, fasten them along the borders with adhesive cable management clips or cable clips. Make sure your cables are out of sight and do not obstruct driving controls by taking your time and hiding them correctly.
Do I need to adjust any settings after installation?
Yes, after installation, it’s essential to adjust the settings on your dash cam according to your preferences and local regulations. This includes configuring parameters such as video resolution, loop recording duration, and parking mode preferences.
Reviewing and adjusting these settings ensures that your dash cam operates optimally and meets your specific needs for recording and storing footage while driving or parked.
How do I make sure my dash cam is recording properly?
First, you want to check that your dash cam records properly by checking its status indicators to confirm it’s powered on. Next, review recent footage to see if it’s capturing clear images and sound effectively.
Periodically inspect the memory card and see that you have sufficient space to record new footage properly. Lastly, test the dash cam under different lighting conditions and driving scenarios to ensure consistent performance.
Can I transfer my dash cam to another vehicle?
Yes, you can transfer your dash cam to another vehicle if needed. Dash cams installed using methods like the cigarette lighter adapter can easily move between vehicles without much hassle. However, transferring hardwired dash cams might require additional effort as they are more permanently installed. Always ensure proper installation and compatibility with the new vehicle before transferring the dash cam.
Final Thoughts
Now that the installation is finished, you have the expertise and resources to optimize your dash camera’s advantages fully. From enhanced security and reassurance to convenience, your own dash cam with cameras stands prepared to document every road experience. Regular maintenance checks are essential to sustain its efficiency.
Drive with assurance, knowing you have a trustworthy observer onboard, primed to record any unforeseen incidents and furnish vital footage when required. Enjoy your journeys, knowing your dash cam provides peace of mind and valuable documentation whenever needed. Safe travels!